Professional painting starts long before the first brushstroke. Learn why expert spackling and surface preparation make the difference between amateur and professional results.
You’ve picked the perfect paint color. You’re ready to transform your space. But here’s what most homeowners don’t realize until it’s too late: the difference between a paint job that looks great for a few months and one that looks flawless for years has almost nothing to do with the paint itself. It’s what happens before the first brushstroke that determines whether you’ll love the results or regret them. The real secret to professional-looking walls starts with proper spackling and surface preparation—the steps that create a smooth, clean canvas for paint to adhere to and perform the way it should.
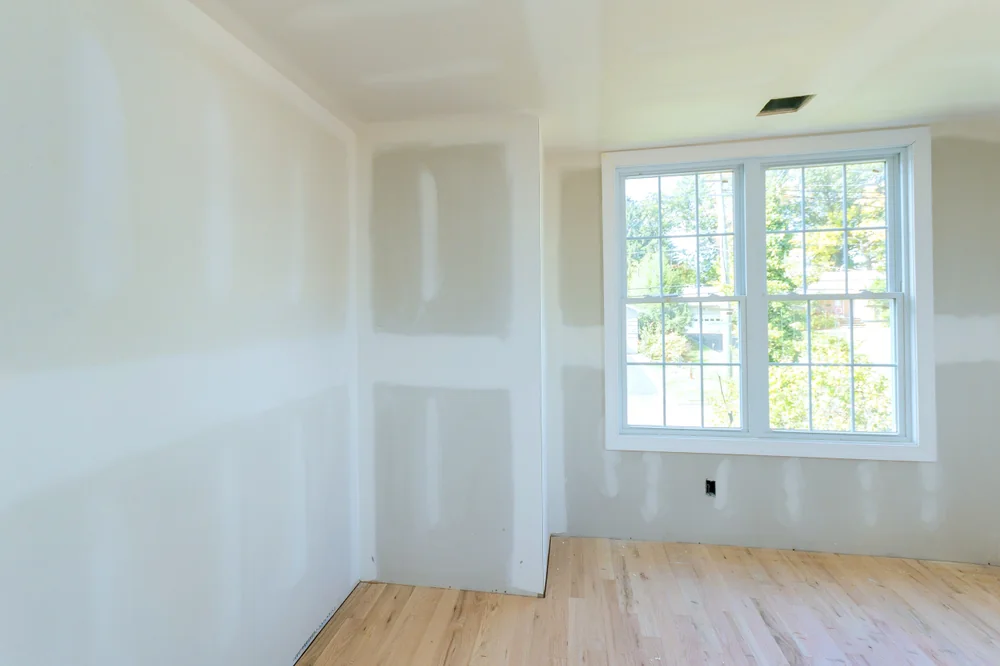
Walk into any room with a fresh coat of paint and you’ll notice something immediately—either it looks smooth, clean, and professionally done, or you can see every imperfection. Nail holes that weren’t quite filled. Uneven patches where spackling wasn’t sanded properly. Rough textures that catch the light wrong.
Paint doesn’t hide problems. It highlights them. That’s why surface preparation accounts for roughly 80% of what makes a paint job look professional or amateurish. You can use the most expensive paint available, but if the walls underneath aren’t properly prepped, you’re just putting a fresh coat over the same old issues.
Proper prep work means your paint adheres correctly, lasts longer, and looks the way it’s supposed to. It means fewer touch-ups, no peeling or bubbling, and a finish that improves your home’s appearance instead of just temporarily covering it up.

Spackling isn’t just about filling holes. It’s about creating a uniform surface that allows paint to sit evenly and look consistent across every inch of your walls. When done right, spackling becomes invisible—you’d never know there was a dent, crack, or nail hole there in the first place.
The process starts with cleaning the area around any imperfection. Dust, debris, and loose paint have to go before any filler touches the wall. Then comes the actual spackling compound, applied with a putty knife at a 45-degree angle to make sure it fills the hole completely while feathering out smoothly beyond the edges.
Here’s where most DIY jobs fall apart: the drying and sanding. Spackling needs time to cure properly. Rush it, and you’ll end up with shrinkage, cracks, or soft spots that show through the paint. Once it’s fully dry, it needs to be sanded flush with the surrounding wall—not just close, but perfectly level. Any ridge or bump will cast a shadow once paint goes on, and suddenly that “fixed” spot becomes the most obvious thing in the room.
Different types of spackling work for different situations. Lightweight spackling dries fast and works well for small nail holes. Heavyweight spackling takes longer to dry but provides the strength needed for larger repairs. The key is matching the right product to the job and knowing how to apply it so it blends seamlessly.
Professional spackling also means understanding how paint interacts with patched areas. Spackle is more porous than drywall, which means it absorbs paint differently. Without proper priming, those patched spots will “flash”—they’ll look duller or shinier than the rest of the wall, creating obvious discoloration that no amount of additional coats will fix.
If you live in Suffolk County, NY, your walls face challenges that homes in other parts of the country don’t deal with. The combination of coastal humidity, temperature swings, and salt air exposure means your interior paint needs to perform differently than it would elsewhere.
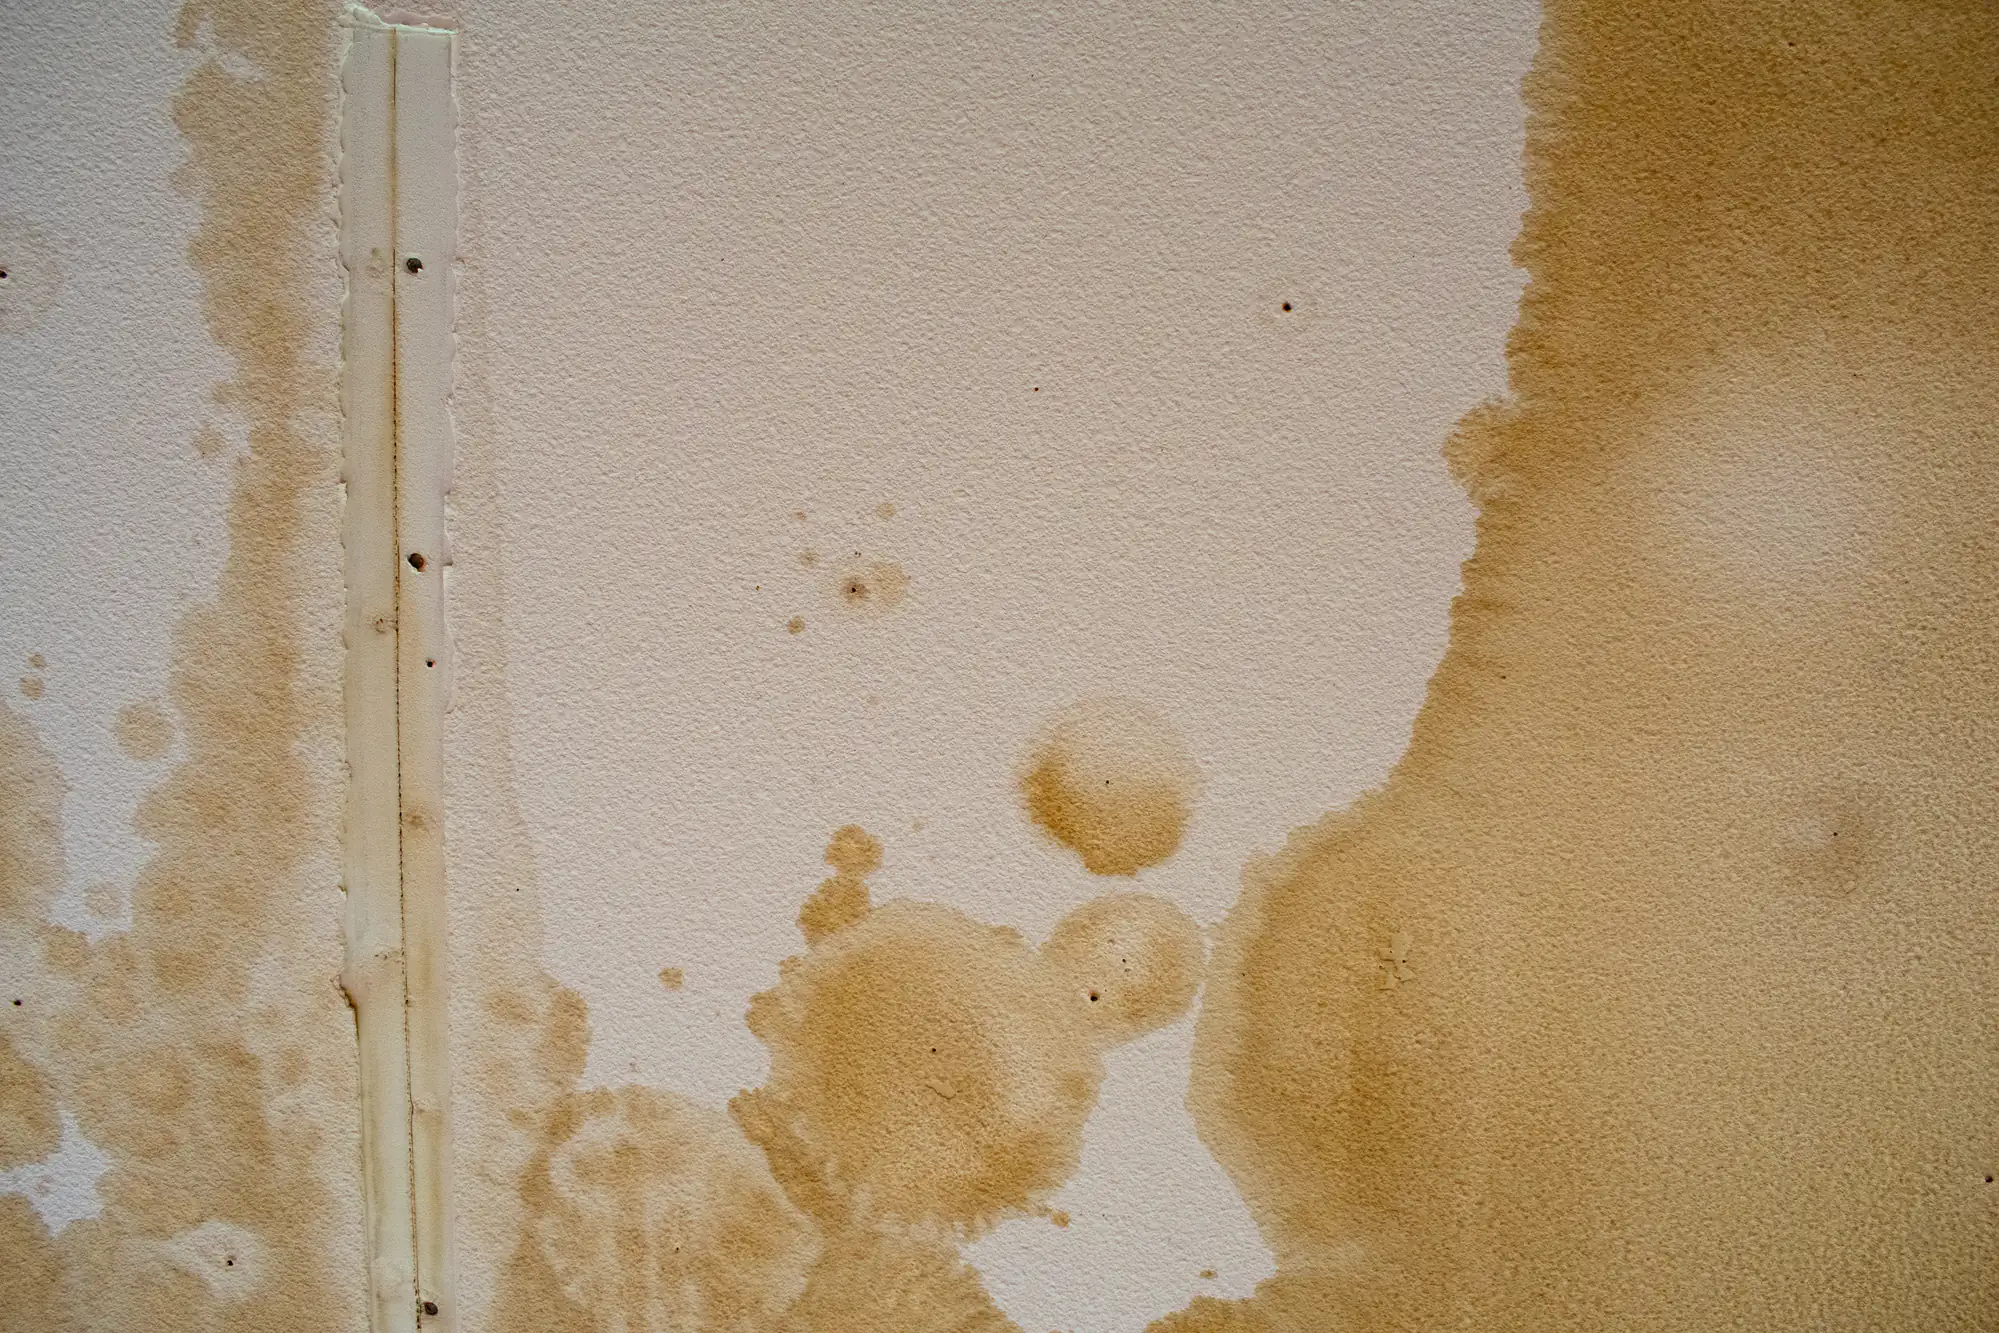
During summer months, humidity levels can spike unexpectedly. When you’re painting in high humidity, the moisture in the air slows down how paint cures and adheres to surfaces. If the prep work wasn’t done right—if surfaces weren’t properly cleaned, dried, and primed—that humidity will cause problems. Paint that doesn’t adhere well will start peeling within months instead of years.
Winter brings its own issues. Dramatic temperature changes stress paint films, especially if the surface underneath wasn’t properly prepared. Cracks that weren’t filled, rough patches that weren’t sanded, or areas that weren’t primed correctly will become weak points where temperature fluctuations cause the paint to fail.
This is why local expertise matters. We understand Suffolk County’s climate and know to monitor humidity levels and adjust our prep and application methods accordingly. We know which primers work best in coastal conditions. We understand that cutting corners on surface preparation might save an hour today but will cost you a full repaint in a year or two.
Proper prep work in Suffolk County means making sure every surface is completely clean and dry before any primer or paint goes on. It means using products designed to handle moisture and temperature variations. And it means taking the time to do things right the first time, because the alternative is watching your investment peel, crack, or fade far sooner than it should.
Want live answers?
Connect with a Jaguar Renovation expert for fast, friendly support.
Even homeowners who invest in quality paint and hire contractors can end up disappointed if the prep work gets skipped or rushed. The most common mistakes all stem from the same problem: underestimating how much proper preparation matters.
Skipping the cleaning step is one of the biggest culprits. Paint doesn’t stick to dust, grease, or grime. If you’re painting kitchen walls without removing the buildup of cooking oils, or bathroom walls without addressing moisture and mildew, you’re setting yourself up for adhesion problems. The paint might look fine initially, but it won’t last.
Another frequent mistake is painting over damaged surfaces without proper repair. Small cracks, dents, and holes might seem minor, but they’ll show through the paint. And once paint is on the wall, fixing those imperfections becomes much harder and more expensive than addressing them beforehand.

Primer often gets treated like an optional step—something you can skip if you’re using “paint and primer in one” products or if you’re just refreshing walls that were recently painted. But primer serves specific purposes that regular paint can’t replicate, and skipping it creates problems that compound over time.
First, primer creates a uniform surface for paint to adhere to. Drywall, spackling compound, old paint, and bare wood all absorb paint at different rates. Without primer, you’ll see variations in sheen and color across your walls—those patched spots will look different no matter how many coats of paint you apply. This is called flashing, and it’s one of the most obvious signs of amateur work.
Second, primer seals surfaces and prevents stains from bleeding through. Water stains, smoke damage, or even marker and crayon marks can show through multiple coats of paint if they’re not properly sealed first. A good stain-blocking primer solves this problem in one coat, while trying to cover stains with paint alone can take four or five coats and still not work.
Third, primer improves paint adhesion and durability. Paint that goes directly onto unprepared surfaces is more likely to peel, especially in high-humidity areas like bathrooms or in homes near the coast. Primer creates a stronger bond between the surface and the topcoat, which means your paint job lasts longer and withstands daily wear better.
The cost of primer is minimal compared to the cost of repainting a room because the first job failed. And the time it takes to apply primer is nothing compared to the time you’ll spend fixing problems later. We never skip the priming step—it’s not about adding an unnecessary expense, it’s about making sure the work actually lasts.
Patience isn’t just a virtue in painting—it’s a requirement. Yet one of the most common mistakes homeowners and rushed contractors make is not allowing adequate drying time between coats. The consequences range from minor imperfections to complete paint failure.
When you apply a second coat of paint before the first one has fully dried, you’re not giving the paint film time to cure properly. The result is a surface that looks smooth initially but develops problems within weeks. You might see bubbling where moisture got trapped between layers. You might notice peeling where the second coat pulled up the first. Or you might just end up with a finish that never quite hardens, staying slightly tacky or easily damaged.
The same applies to spackling and primer. Spackling compound needs time to dry completely before sanding. If you sand too early, you’ll create divots and uneven spots. If you paint over spackling that hasn’t fully cured, it will shrink over time, creating depressions that show through the paint.
Primer also needs proper drying time. Most primers require at least a few hours to dry before topcoat application, and some need longer depending on humidity and temperature. Rushing this step means your paint won’t adhere properly, and you’ll see the consequences in reduced durability and premature wear.
Environmental factors affect drying times significantly. High humidity slows everything down. Low temperatures do the same. Good ventilation helps, but only if you’re not creating drafts that cause uneven drying. We account for all these variables, adjusting our timeline based on actual conditions rather than just following the label’s “ideal” drying times.
The bottom line is simple: taking the extra time to let each step dry properly costs you nothing but patience. Rushing the process costs you money, time, and the quality of your finished result. A paint job that’s done right takes longer upfront but saves you from having to redo it a year later.
The difference between a paint job that looks good and one that looks professional comes down to what happens before any color touches your walls. Proper spackling creates smooth, invisible repairs. Thorough surface preparation guarantees paint adheres correctly and lasts for years. Adequate drying time between steps prevents the failures that lead to costly do-overs.
These aren’t optional steps or corners you can cut to save time. They’re the foundation of quality work—the difference between a finish that makes you proud of your home and one that makes you wish you’d done it differently. No matter if you’re refreshing a single room or tackling a full interior renovation that includes kitchen remodeling, bathroom updates, new flooring, basement finishing, sheetrock repair, or custom carpentry, the same principle applies: preparation determines outcome.
When you’re ready to upgrade your Suffolk County home with painting and renovation work you can trust, we bring nearly a decade of experience and a commitment to doing things right the first time. No hidden costs, no pressure, just honest craftsmanship and the results your home deserves.
Summary:
Share: