Planning a renovation? Discover the most common sheetrock and drywall mistakes that lead to visible seams, cracking, and costly repairs—and how to avoid them.
Sheetrock isn’t just about covering studs and creating walls. It’s about creating surfaces that hold up, look right, and don’t announce themselves every time the light hits them at an angle.
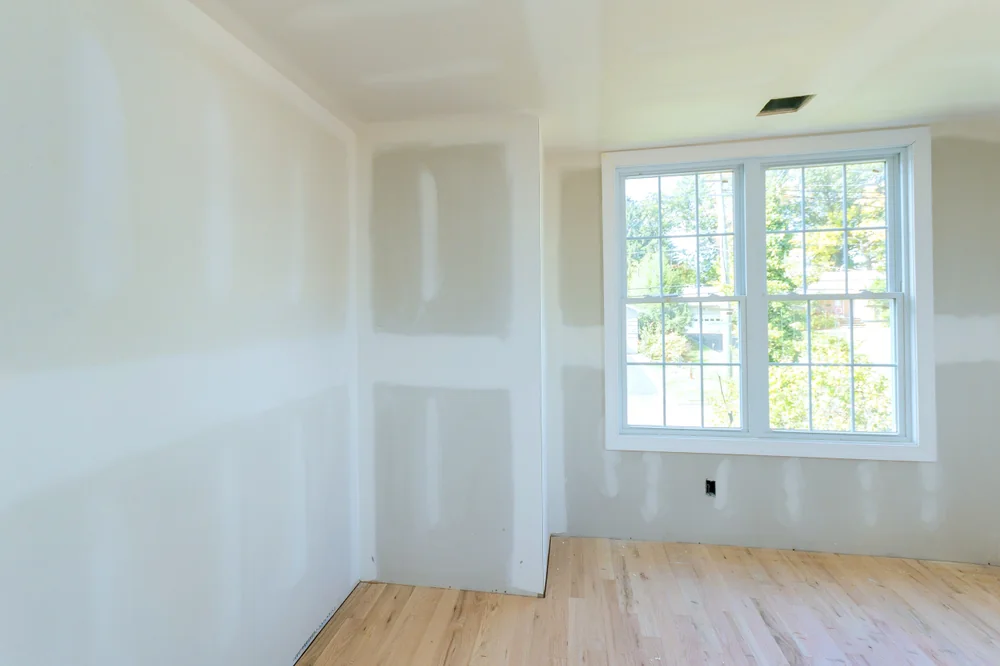
When installation is done properly, you don’t notice it. Seams disappear. Textures blend. The walls just look like walls. But when it’s done poorly, you’ll see it—and so will anyone else who walks into the room.
Visible tape lines, uneven surfaces, and cracks that show up months later all point back to installation mistakes that could have been avoided. In Suffolk County, NY, where homes range from 1990s builds to brand-new construction, the quality of your sheetrock work affects everything from your home’s appearance to its resale value. Getting it right the first time isn’t just about aesthetics—it’s about not having to pay someone to fix it later.

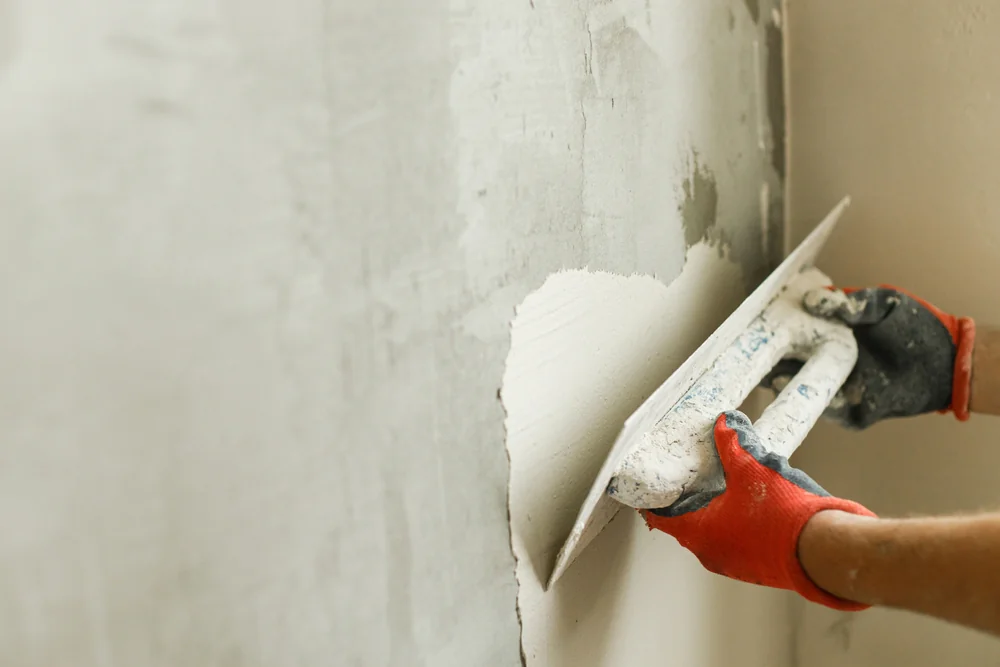
One of the most common errors is trying to cover everything in one thick coat. It seems efficient—get it done faster, move on to the next step. But thick layers of joint compound don’t dry evenly. They crack as they shrink, take forever to cure, and create surfaces that are harder to sand smooth without making new problems.
The right approach uses thin, even coats. Apply just enough to cover the tape or fill the seam, then let it dry completely before adding another layer. Yes, this takes more time. But it’s the difference between a surface that stays smooth and one that develops spiderweb cracks three months after you finish painting.
Each coat should extend slightly beyond the previous one, feathering the edges so there’s no visible ridge where the compound meets the existing wall. A 6-inch knife works for the first coat, but you’ll want a 10- or 12-inch knife for subsequent layers to create that gradual transition. Trying to rush this process with heavy applications just creates more work later when you’re sanding down lumps and filling in cracks that shouldn’t be there.
Proper joint compound application also means knowing when to stop. If you can still see the tape after two or three coats, that’s normal. Covering it completely in one or two passes means you’ve applied too much. The goal isn’t to bury the tape under a mountain of mud—it’s to create a flat, smooth transition that becomes invisible once painted.
Temperature and humidity affect drying time too. In Suffolk County, NY’s humid summers, compound takes longer to cure than in winter when the heat’s running. Don’t rush it. Applying the next coat before the previous one is fully dry traps moisture and leads to problems you won’t see until later.
Tape that isn’t properly embedded is tape that’s going to fail. You’ll see it bubble. You’ll watch it peel at the edges. Eventually, it’ll come loose entirely, leaving you with a seam that needs to be redone from scratch.
The process sounds simple—apply a thin layer of compound, press the tape into it, smooth it out with a knife. But there’s a difference between going through the motions and actually doing it right. The tape needs to be pressed firmly into wet compound so there are no air pockets underneath. Those pockets are where bubbles form and where the tape loses its bond with the wall.
Paper tape works best for most seams and inside corners. It’s strong, it doesn’t stretch, and it creates a tight bond when embedded properly in joint compound. Mesh tape has its place—mainly for repairs and quick fixes—but it needs to be paired with setting-type compound, not all-purpose mud, or you risk cracking and failure down the line.
When you’re embedding tape, the knife angle matters. Hold it at about a 45-degree angle and use firm, consistent pressure as you smooth the tape down. You should see a thin layer of compound squeeze out from under the tape as you work. That’s what you want—it means the tape is making full contact with the wall and the compound underneath.
Wrinkles in the tape create weak points. If you see them forming as you apply the tape, stop and reposition before the compound starts setting up. A wrinkled seam will show through paint no matter how many coats you apply over it. Taking an extra minute to get the tape straight and smooth saves hours of rework later.
Don’t skip the base coat of compound under the tape either. Some people try to apply tape directly to the drywall and then cover it with mud. That doesn’t work. The tape needs compound underneath to adhere properly. Without it, you’re just sticking paper to gypsum and hoping it stays there.
Want live answers?
Connect with a Jaguar Renovation expert for fast, friendly support.
Nothing announces a patch job quite like texture that doesn’t match. You can get the drywall taping perfect, the compound smooth, and the surface sanded just right—but if the texture doesn’t blend with the surrounding wall, everyone who walks into the room will spot it immediately.
Wall texture matching is part technique, part practice, and part understanding what you’re looking at. Orange peel, knockdown, skip trowel, splatter—each one requires a different approach and different tools. Trying to replicate a texture you’ve never worked with before usually means you’ll be doing it twice. Once to see what doesn’t work, and again to fix it.
The other issue is that textures age. What looks like a simple splatter finish might have been applied 20 years ago and has since been painted over multiple times. That changes how it looks and how thick it feels. Matching it means accounting for that aging, not just copying the pattern.

You wouldn’t paint a room without testing the color first. Same logic applies to texture, but most people skip it anyway. They mix up the compound, grab the spray can or roller, and go straight to the repair area. Then they step back and realize it doesn’t match.
A test patch takes five minutes. Use a piece of scrap drywall or cardboard. Apply the texture using the same technique, the same tools, and the same material you plan to use on the actual repair. Let it dry and compare it to the existing wall. Adjust your technique if needed and try again until it matches.
The spray distance matters if you’re using aerosol texture. Too close and the texture comes out heavy and thick. Too far and it’s too light and fine. The difference between matching and not matching can be as simple as moving the can two inches closer or farther from the wall. You won’t know that until you test it.
Roller texture requires the right nap thickness. A 1/2-inch nap creates a different pattern than a 3/4-inch nap. The amount of compound you load onto the roller changes the result too. Light application gives you a subtle texture while heavy application creates deeper peaks and valleys. Again, testing tells you what works before you commit to the actual repair.
Knockdown texture adds another variable—timing. You apply the texture, wait for it to set up slightly, then lightly flatten the peaks with a trowel or knife. Wait too long and it’s too dry to knock down smoothly. Don’t wait long enough and you just smear it around. The only way to figure out the right timing is to practice on your test patch first.
Extending your texture application beyond the repair area helps with blending. Don’t stop right at the edge of your patch. Go 4 to 6 inches past it, feathering the new texture into the old so there’s no hard line where one stops and the other starts. This creates a transition zone that makes the repair invisible once painted.
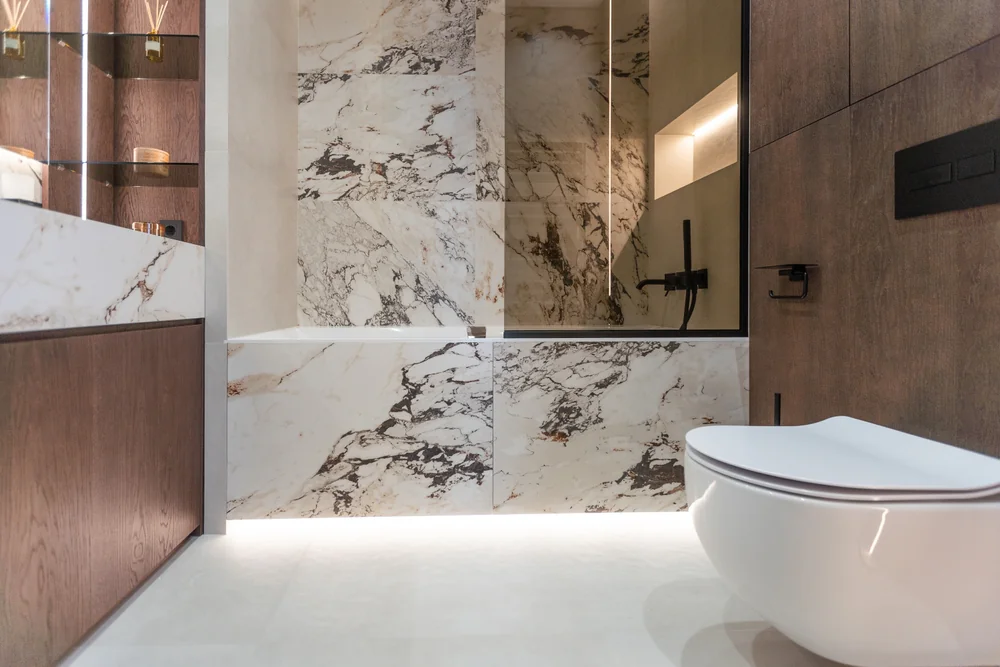
Regular drywall in a bathroom is a recipe for mold. Standard sheetrock in a basement that sees occasional moisture is asking for problems. Using the wrong type of material for the location is one of those mistakes that doesn’t show up immediately—but it will show up.
Moisture-resistant sheetrock exists for a reason. It’s designed with a treated core and moisture-resistant facing that holds up in high-humidity environments. Bathrooms, kitchens, laundry rooms, and basements all benefit from moisture-resistant board. You’ll recognize it by the purple or green paper facing. It costs a bit more than standard drywall, but it’s worth it when you’re not dealing with water damage and mold growth a year later.
There’s a common misconception that moisture-resistant drywall is a vapor barrier. It’s not. It has a perm rating around 24 to 25, which means it still allows moisture to pass through. That’s important in areas where you’re installing tile. If you put a vapor barrier behind tile—which creates its own vapor barrier with the mastic—you trap moisture between the two layers. That moisture has nowhere to go, and it degrades the drywall over time.
Fire-resistant drywall, often called Type X, is thicker and contains additives that help it resist fire longer than standard sheetrock. Building codes often require it in garages, between attached living spaces, and in certain ceiling applications. Using regular 1/2-inch drywall where code calls for 5/8-inch Type X isn’t just a mistake—it’s a code violation that can cause issues during inspections or when you sell your home.
Acoustic or soundproof drywall is another specialty product. It’s denser than regular sheetrock and designed to reduce sound transmission between rooms. If you’re finishing a basement that includes a media room or you’re adding a bedroom that shares a wall with a noisy area, acoustic insulation combined with proper drywall makes a difference. Regular sheetrock won’t give you the same sound control, no matter how many layers you use.
Choosing the right material starts with understanding where it’s going and what it needs to do. We spec moisture-resistant board for bathrooms without being asked. We recommend Type X where it’s required and suggest acoustic options when soundproofing matters. That’s the kind of detail work that separates a job done right from one that creates problems down the road.
Even perfect drywall taping and finishing can’t fix problems that start during installation. If the sheetrock isn’t hung correctly, if the surface isn’t prepped properly, or if fasteners are driven wrong, you’ll see the consequences later—usually after the paint goes on and it’s too expensive to fix easily.
These are the mistakes that happen before anyone thinks about joint compound or texture. They’re also the ones that separate contractors who understand the fundamentals from those who are just trying to get through the job quickly.
Summary:
Share: